LCS Propeller installation & configuration
The Lift Connect System (LCS) lets you easily configure your propulsion setup, no tools required, with a range of options for different riding experiences,…
In this article
The Lift Connect System (LCS) lets you easily configure your propulsion setup, no tools required, with a range of options for different riding experiences, depending on your motor size. Follow these steps to configure your LCS setup.Some LCS configurations feature an open propeller. Using the propulsion with an open propeller involves inherent risks that may result in serious injury or death. Do not handle the propeller while the battery is connected.
Only use the throttle when prepared, clear, and ready.
Keep fingers, toes, and body parts clear of the propeller, as contact with the spinning propeller can cause serious injury or death.
STEP 1: DETERMINE YOUR PROPULSION MOTOR SIZE
Lift offers 2 different propulsion sizes for different applications.
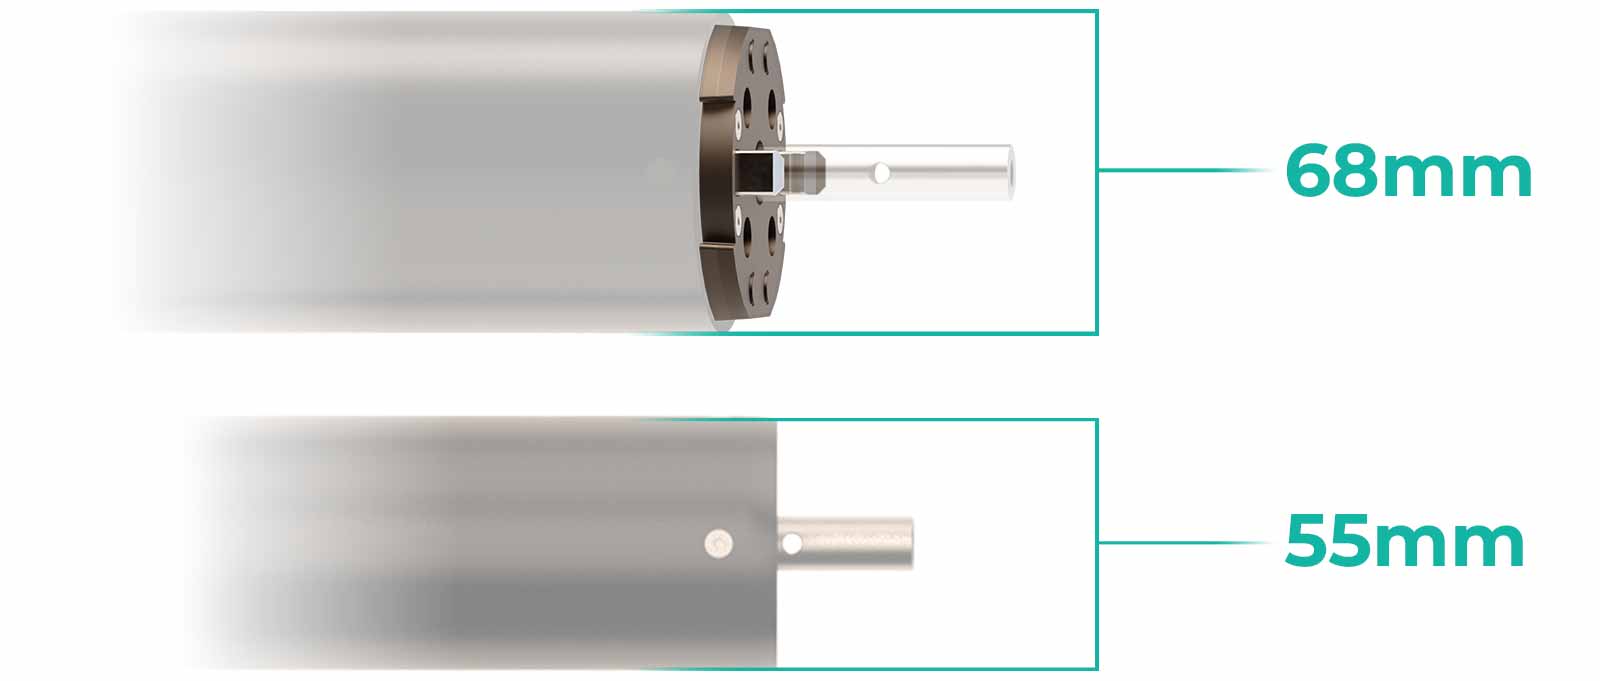
The 68mm motor propulsion ships with our LIFT5, LIFT5 F, LIFT4, and LIFT3 eFoil products. The smaller 5mm motor propulsion ships with our LIFTX lineup, and is available on our high-mount propulsion accessory. If you have a 55mm motor propulsion, the LCS is already integrated into your setup. Please proceed to STEP 4.Please identify your motor size to ensure the components you select are compatible with your motor size.

STEP 2: DO YOU HAVE LCS INSTALLED?
Our newer Lift eFoils (LIFT4, LIFT5, and LIFTX) come standard with the LCS system installed.The LCS system can be visually identified by the quick-release tabs on the components:If your setup has these tabs present, your LCS system is already installed and ready to configure. Proceed to STEP 4. If not, continue to STEP 3.
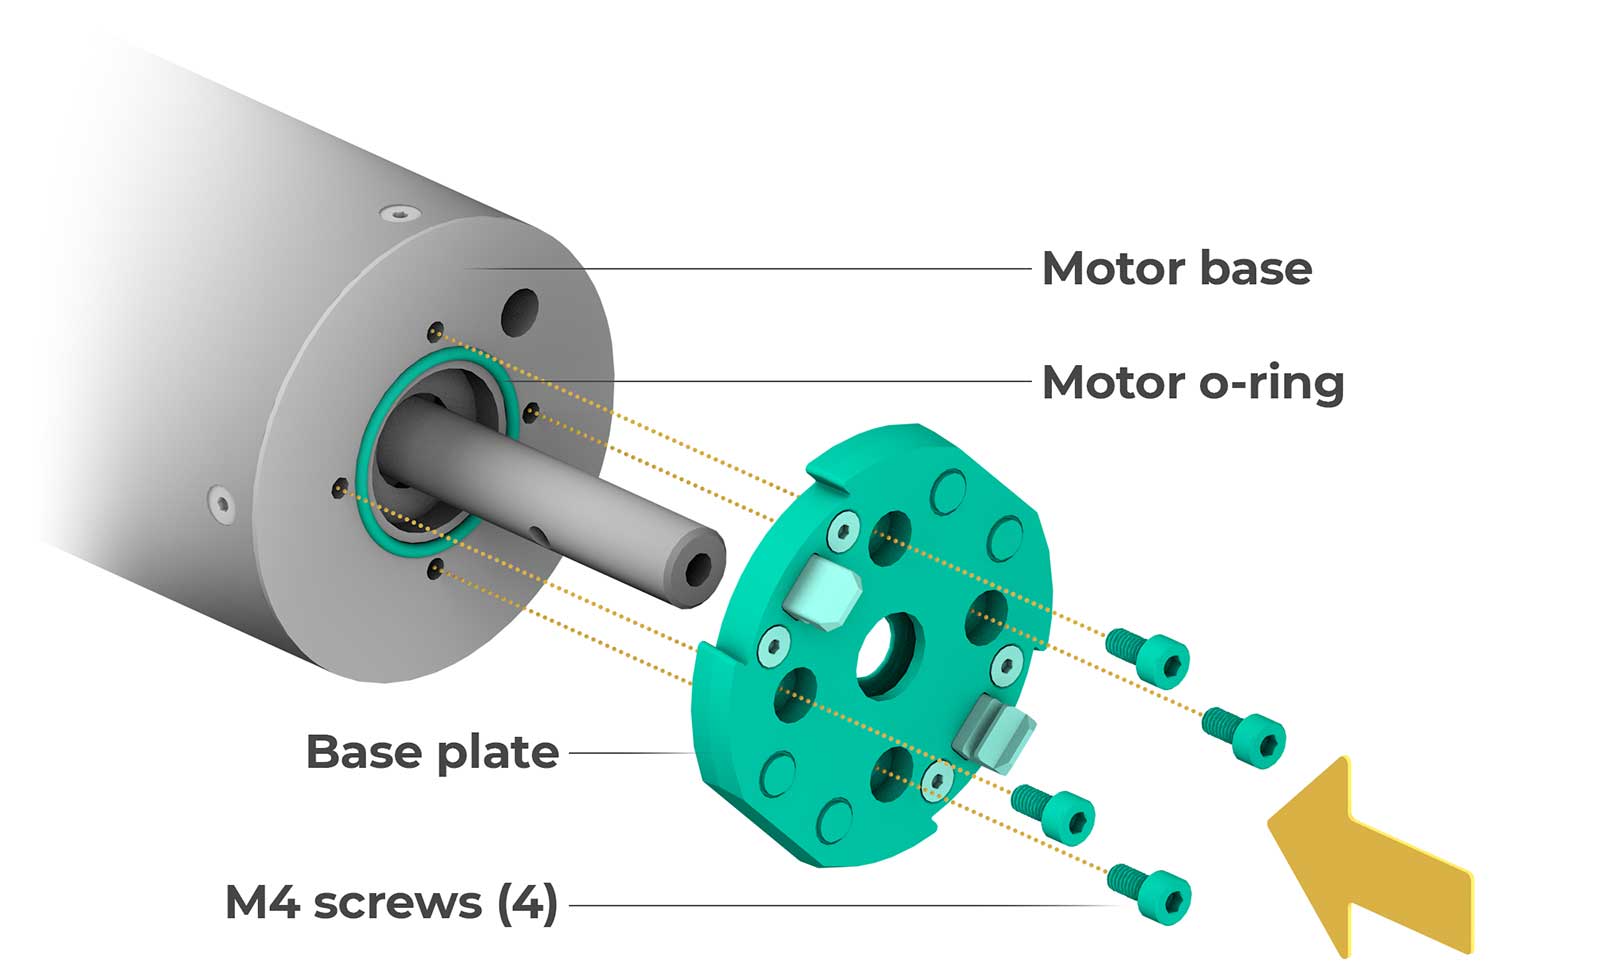
STEP 3: INSTALL THE LCS BASEPLATE
If your system is not currently set up for LCS components (LIFT5 F, LIFT 3 or older), follow these steps to remove your existing setup and install the LCS baseplate.**Before you begin, it is critical all eFoil equipment is turned off and the battery is disconnected before working with or around the motor or propellers.**Before beginning the LCS Jet installation, remove any existing propulsion components, such as a propeller, jet, or shroud. The base of the motor should be clear and visible, as shown below. Please note that your previous hardware setup may have included an o-ring (shown below). You can re-use your existing o-ring, or install the included o-ring for your LCS Jet configuration. Ensure the o-ring is tightly in place before attaching the LCS base plate. Next, use the four M4 screws to attach the LCS base plate to the base of your motor. Apply thread-locking fluid to screws before installing them with the included 3mm hex key. Do not overtighten the M4 screws.
STEP 4: INSTALLING LCS COMPONENTS
LCS components can be easily installed and removed by aligning the metal tabs and pressing the components to lock them in place. Ensure your components are fully seated with no misalignment before powering on.
Please refer to the installation information below for your specific propulsion size:
68mm Motor Propulsion
55mm Motor Propulsion
For availability and additional product information on the features and benefits of the configurations below, please visit the Lift Accessories & Parts Page.Refer to the guide below for different 68mm configurations, including the required components, which are listed below in order of installation:
LCS Jet
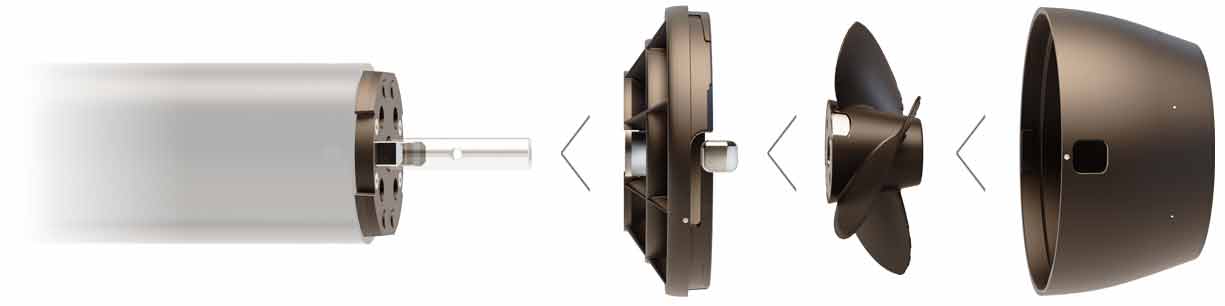
Components: • LCS Base Plate • LCS Jet (Shroud, impeller, and nozzle) View the LCS Jet Installation Guide
LCS Fixed Propeller w/ LCS Shroud
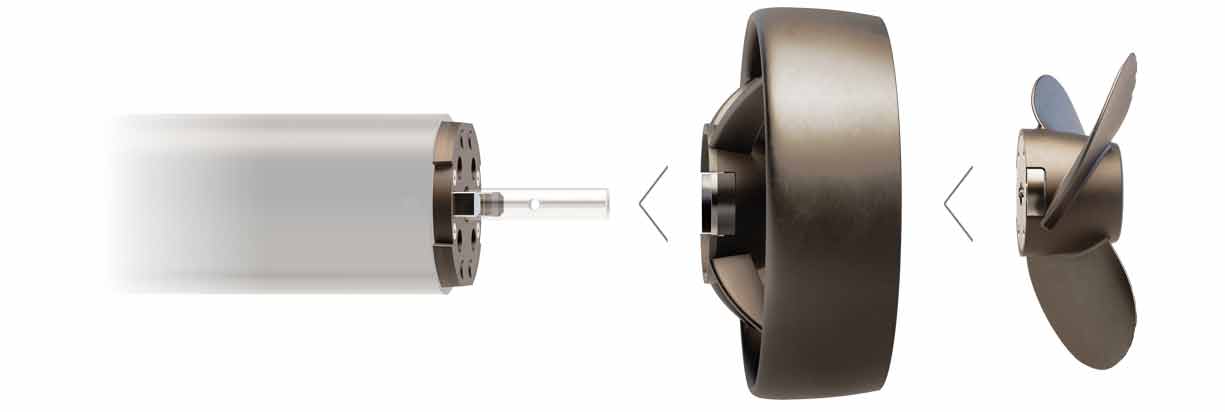
Components: • LCS Base Plate • LCS Shroud • LCS Fixed Propeller View the Fixed Propeller Installation Guide
LCS Fixed Propeller w/ LCS Tail Cone
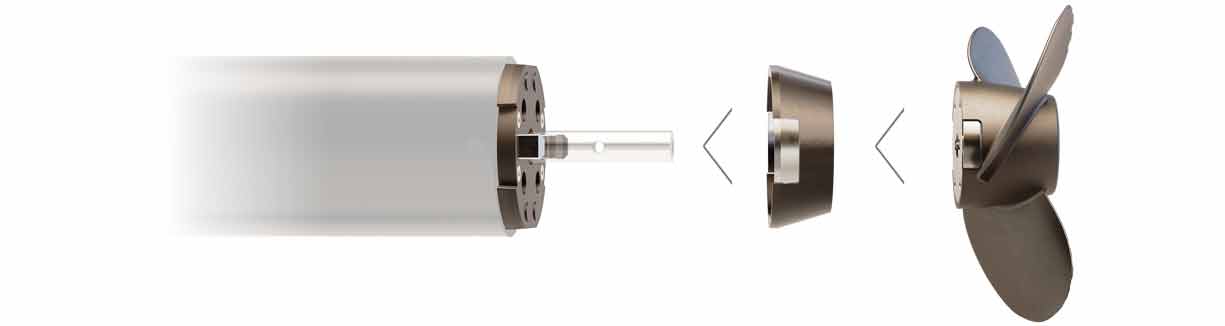
Components: • LCS Base Plate • LCS Tail Cone • LCS Fixed Propeller View the Fixed Propeller Installation Guide
LCS Folding Power Propeller

Components: • LCS Base Plate • LCS Tail Cone • LCS Folding Power Propeller View the Folding Propeller Installation Guide
LCS Folding Glide Propeller

Components: • LCS Base Plate • LCS Tail Cone • LCS Folding Glide Propeller View the Folding Propeller Installation GuideRefer to the guide below for different 55mm configurations, including the required components, which are listed below in order of installation:
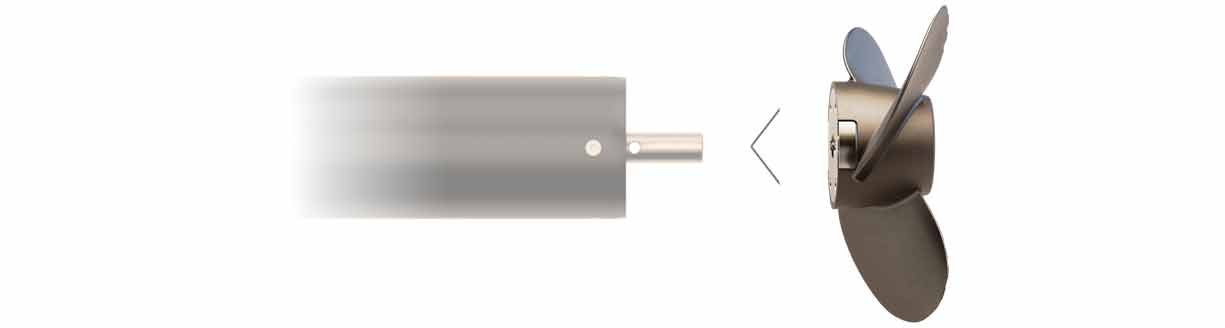
LCS Folding Glide Propeller

Components: • LCS Folding Glide Propeller
LCS Folding Power Propeller

Components: • LCS Folding Power Propeller
LCS Fixed Propeller
Components: • LCS Fixed Propeller