Lift Jet installation guide
The Lift Jet is quick and easy to assemble:⚠️ Before you begin, it is critical all eFoil equipment is turned off and the battery is disconnected before working…
The Lift Jet is quick and easy to assemble:⚠️ Before you begin, it is critical all eFoil equipment is turned off and the battery is disconnected before working with or around the motor or propellers.

STEP 1
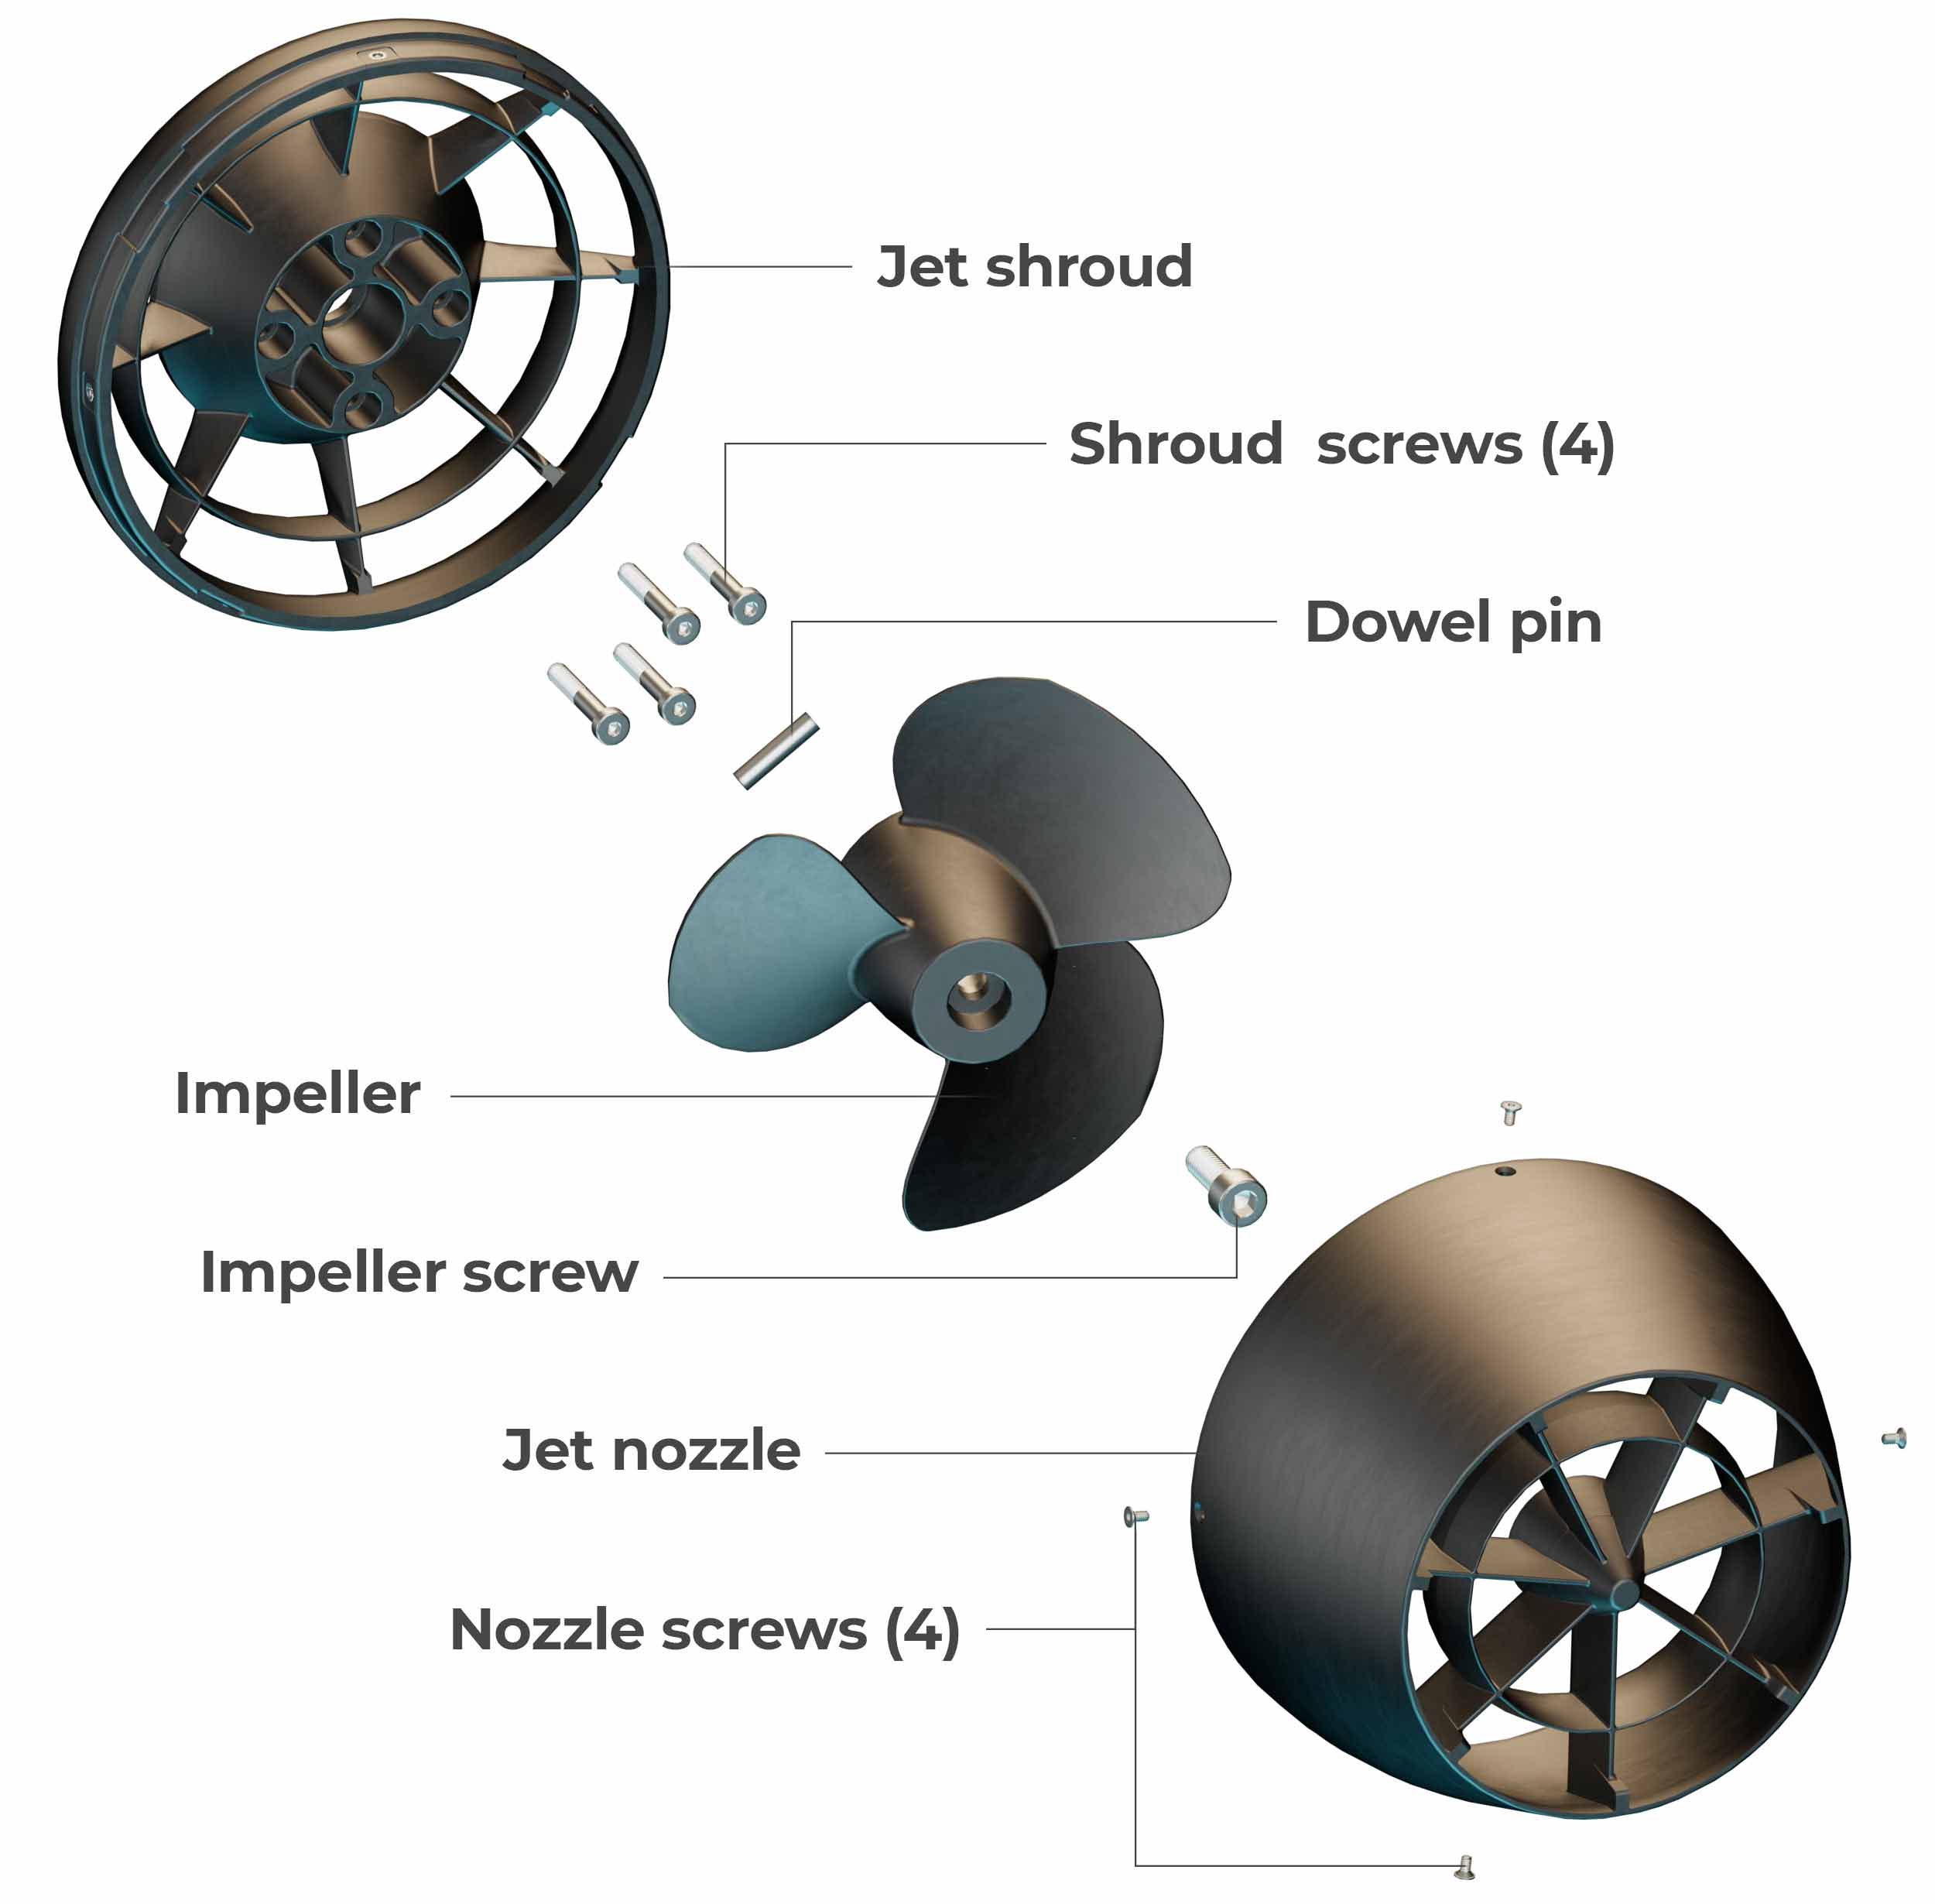
Check to make sure you have all components ready for your Lift Jet installation:
All tools required for installation are included in your Lift Jet kit.
STEP 2
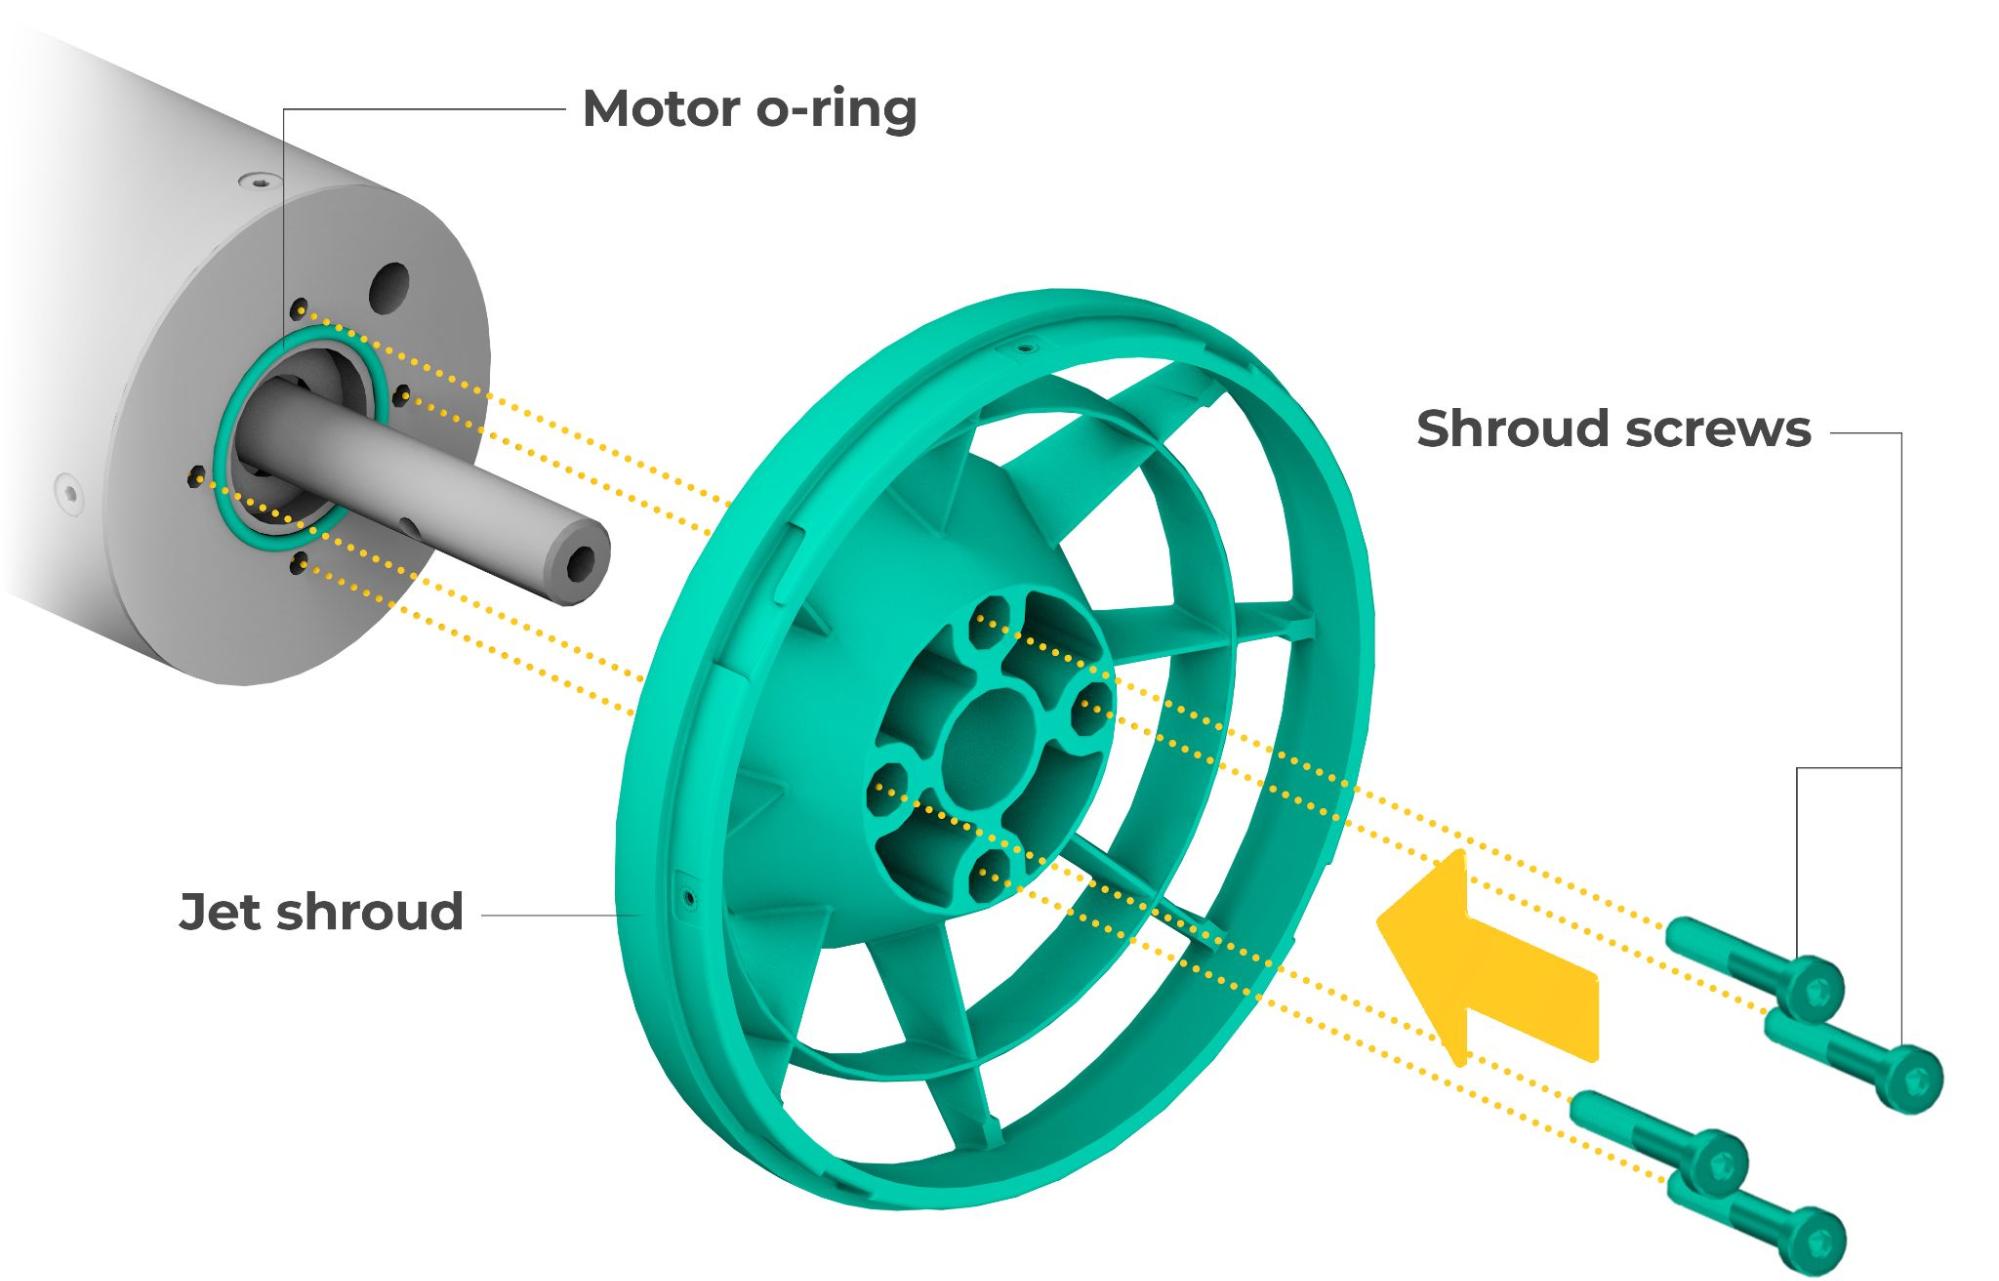
Before beginning the Lift Jet installation, remove any existing propulsion components, such as a propeller, jet, or shroud. The base of the motor should be clear and visible, as shown in the next step. Please note that your previous hardware setup may have included an o-ring (shown in step 3). You can re-use your existing o-ring, or install the included o-ring for your Lift Jet configuration.
STEP 3
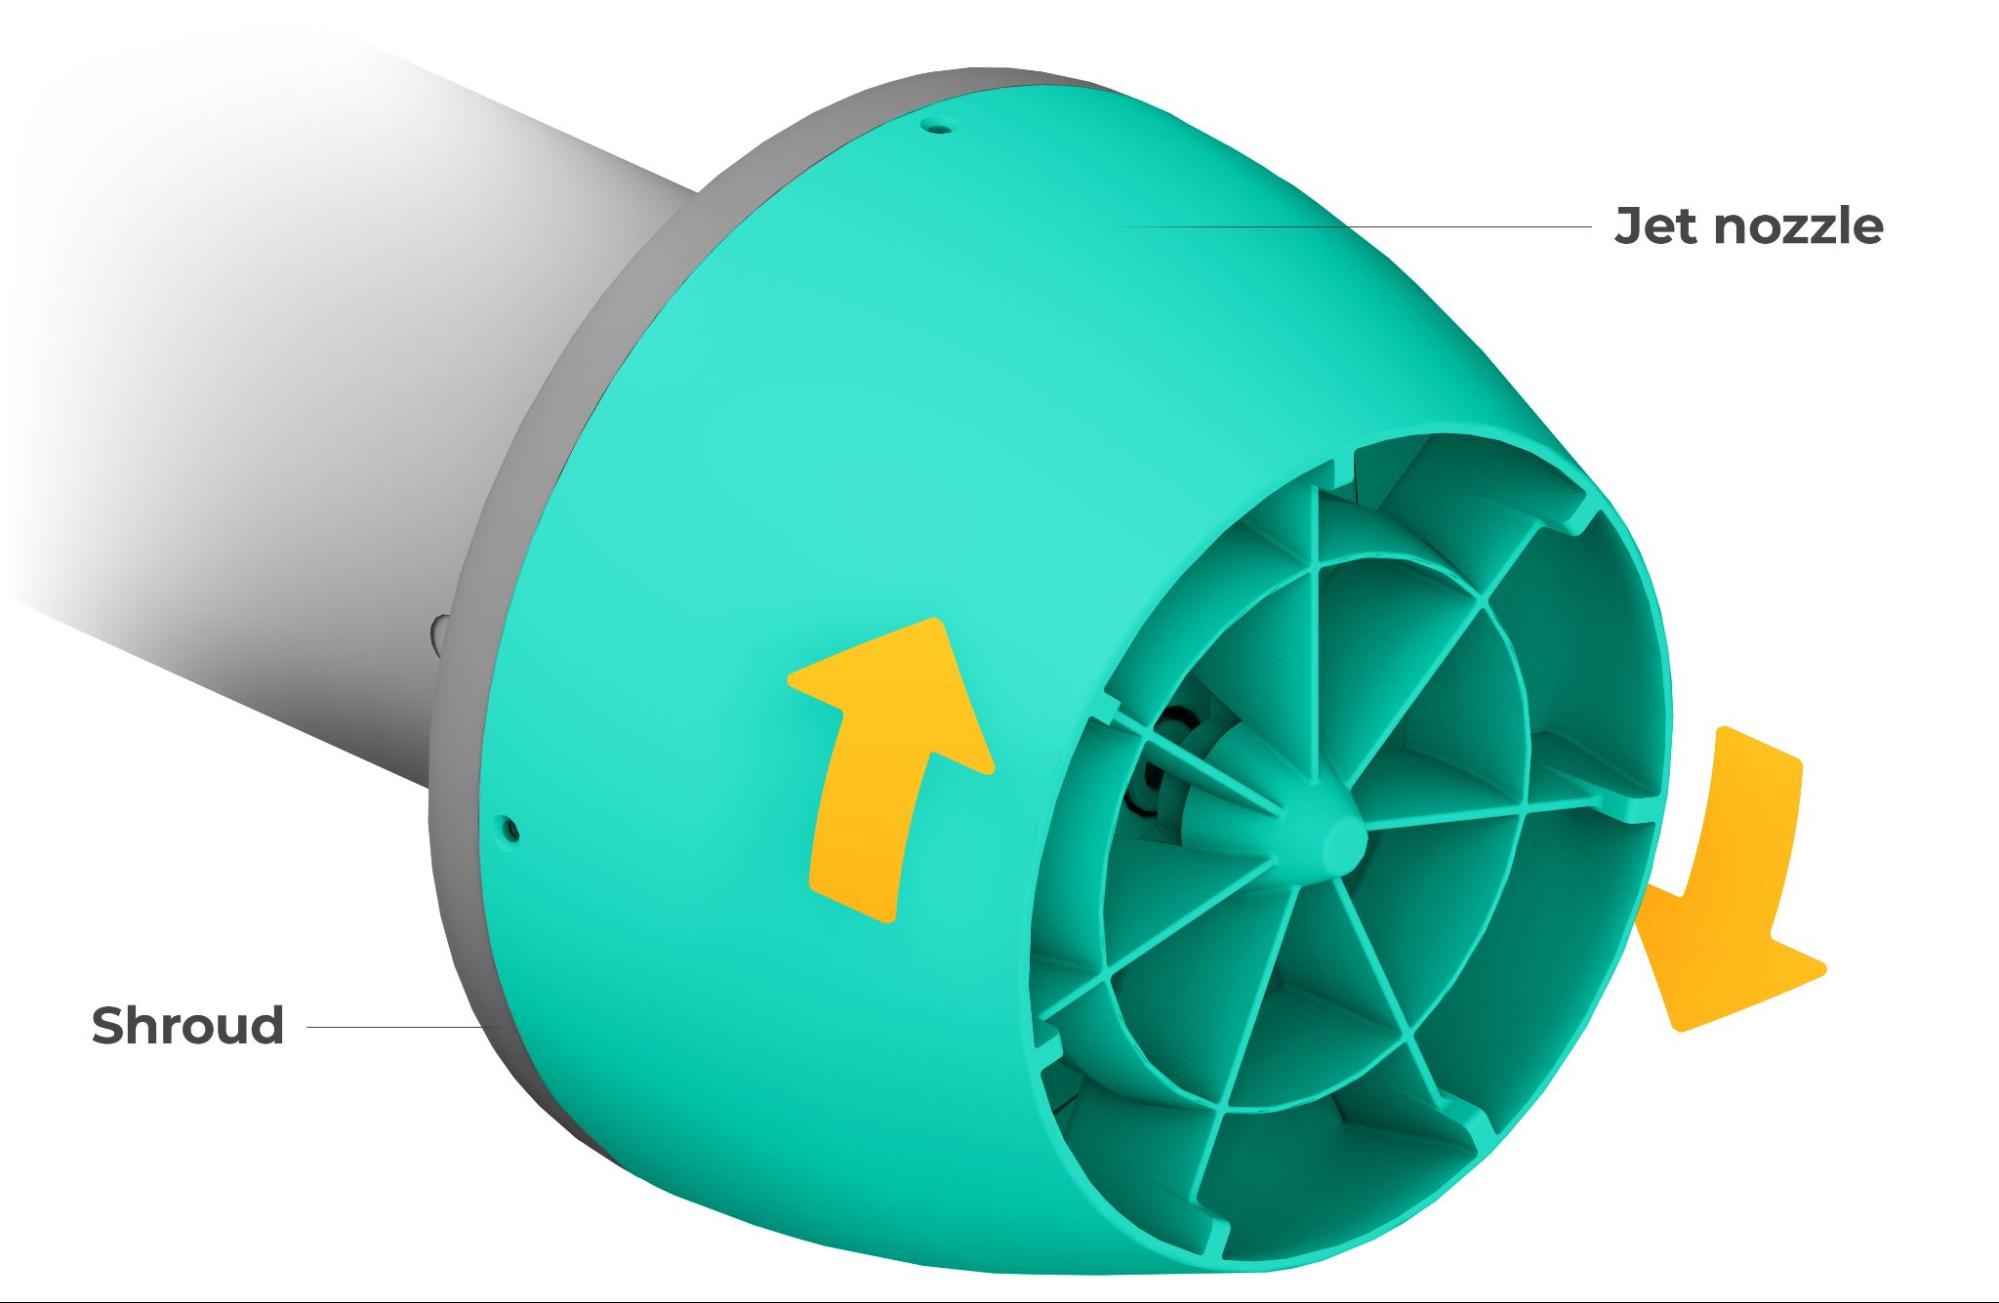
Ensure the o-ring is in place. Bolt the shroud to the motor using the 2.5mm hex key for the 4 shroud screws. Do not overtighten the screws.
STEP 4
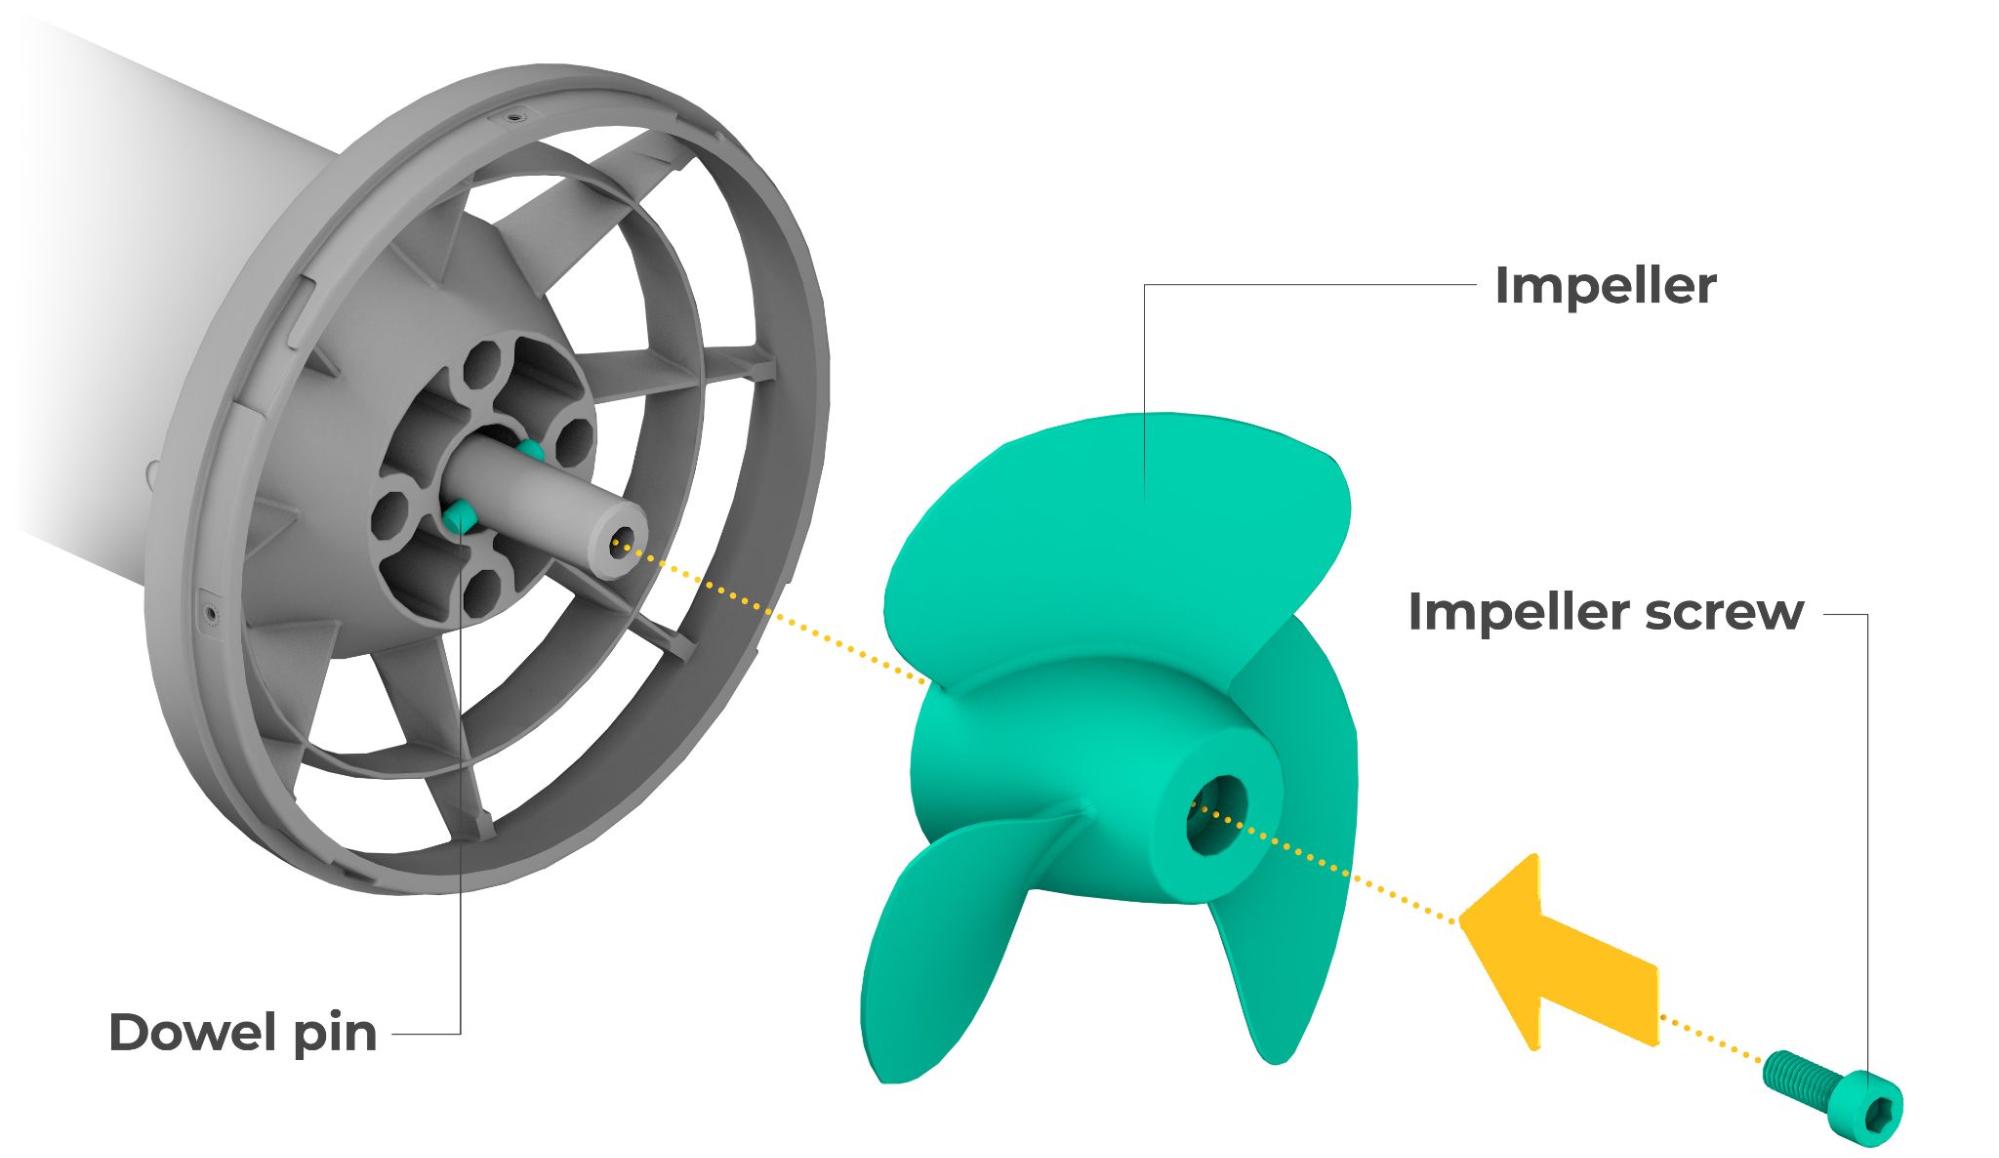
Place the dowel pin into the hole on the motor shaft, with equal parts sticking out from each side.

Slide the jet impeller onto the shaft, and align it with the pin. Next, locate the impeller screw and apply the provided thread locking fluid. Install the screw using the 5mm hex key, while maintaining the alignment of the impeller and dowel pin. Do not overtighten the screw.
STEP 5
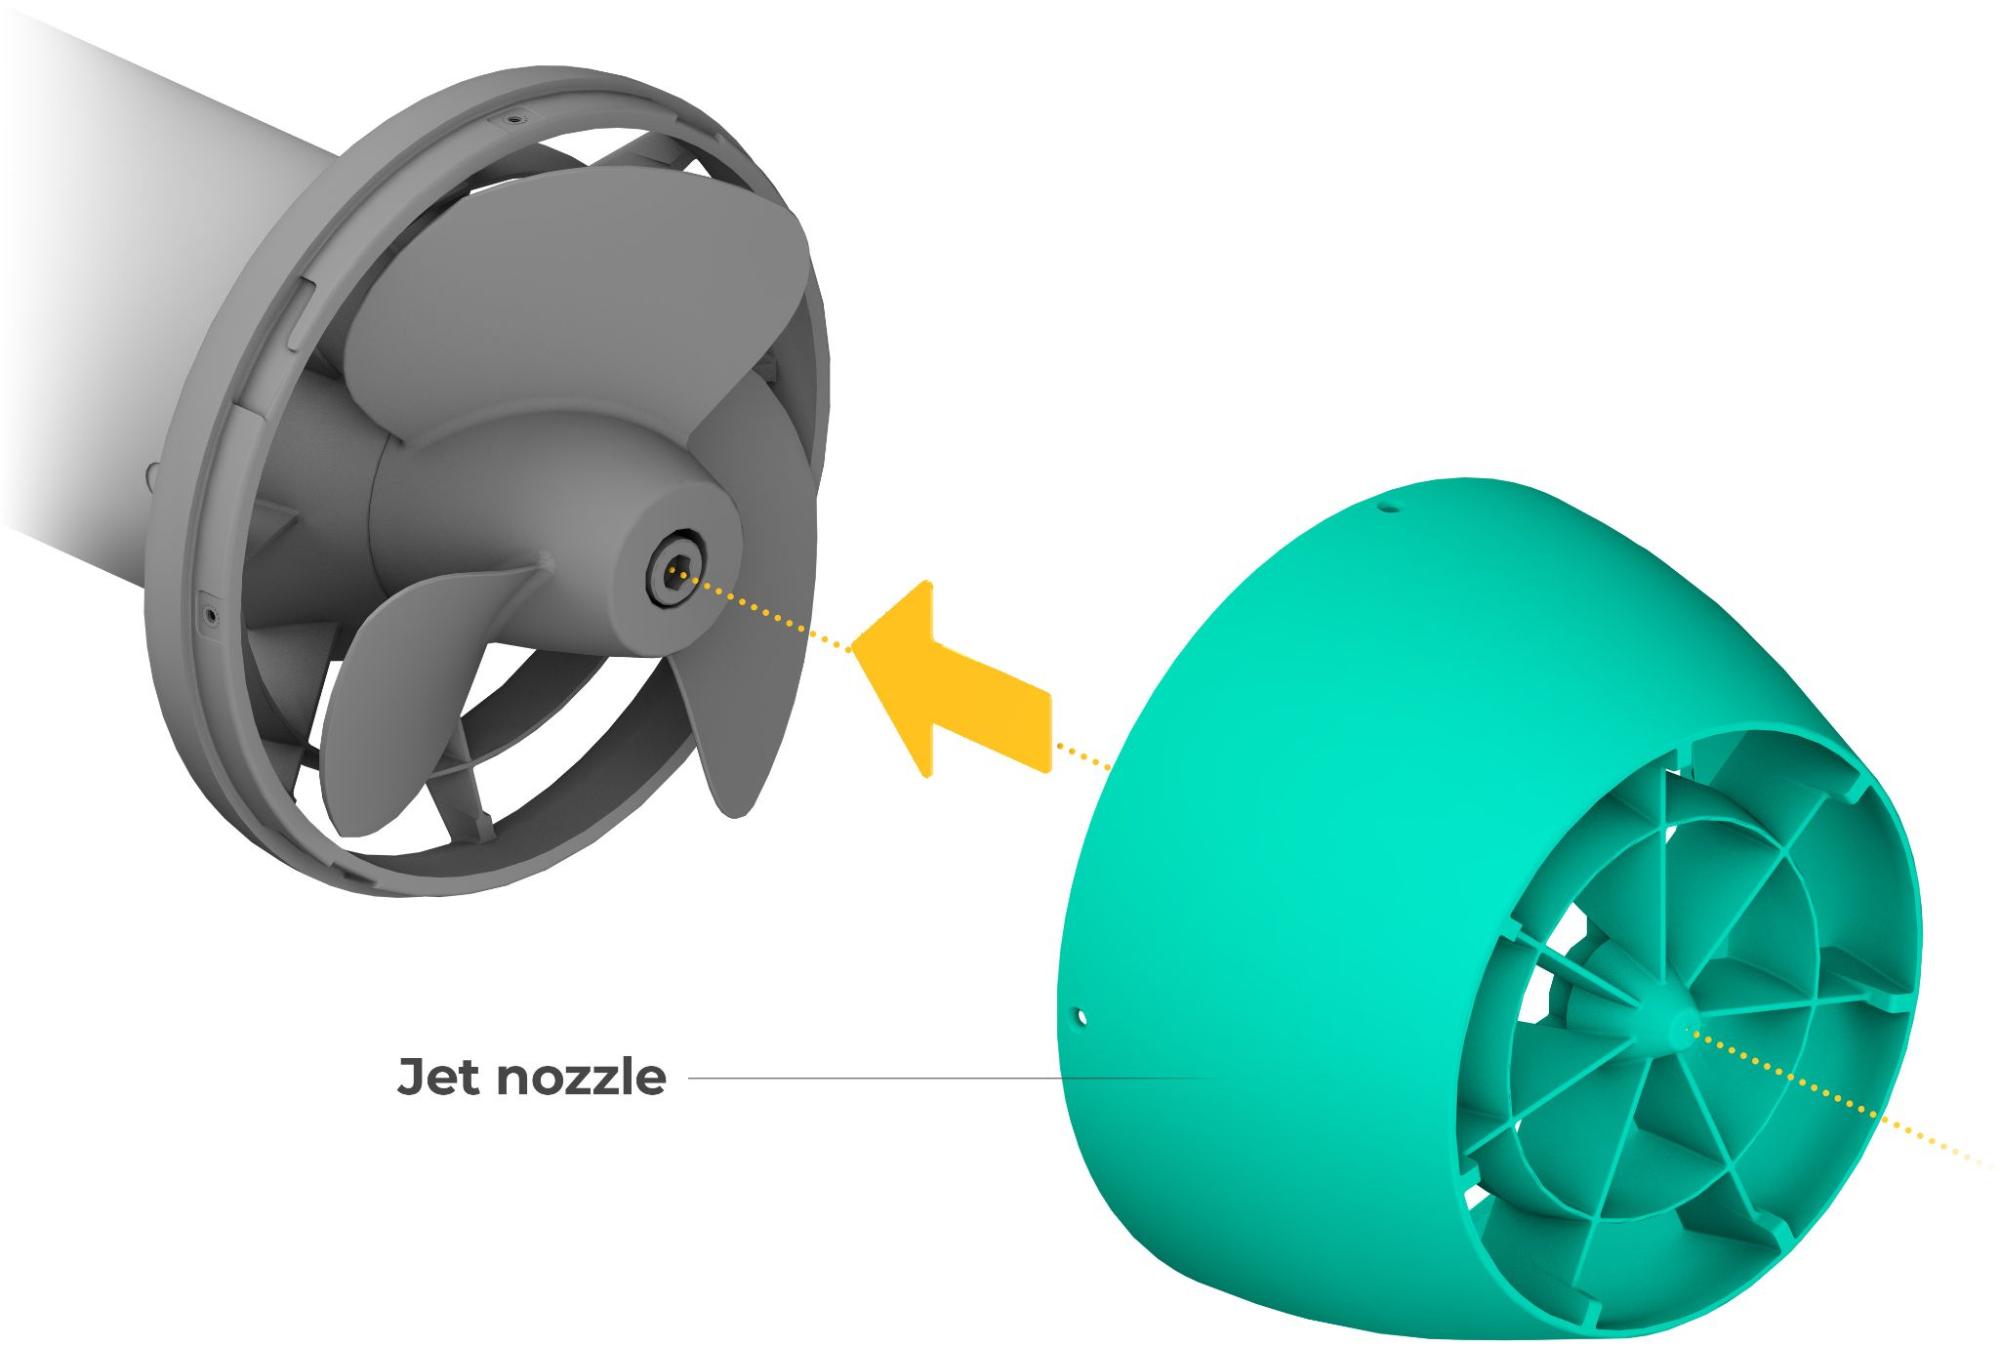
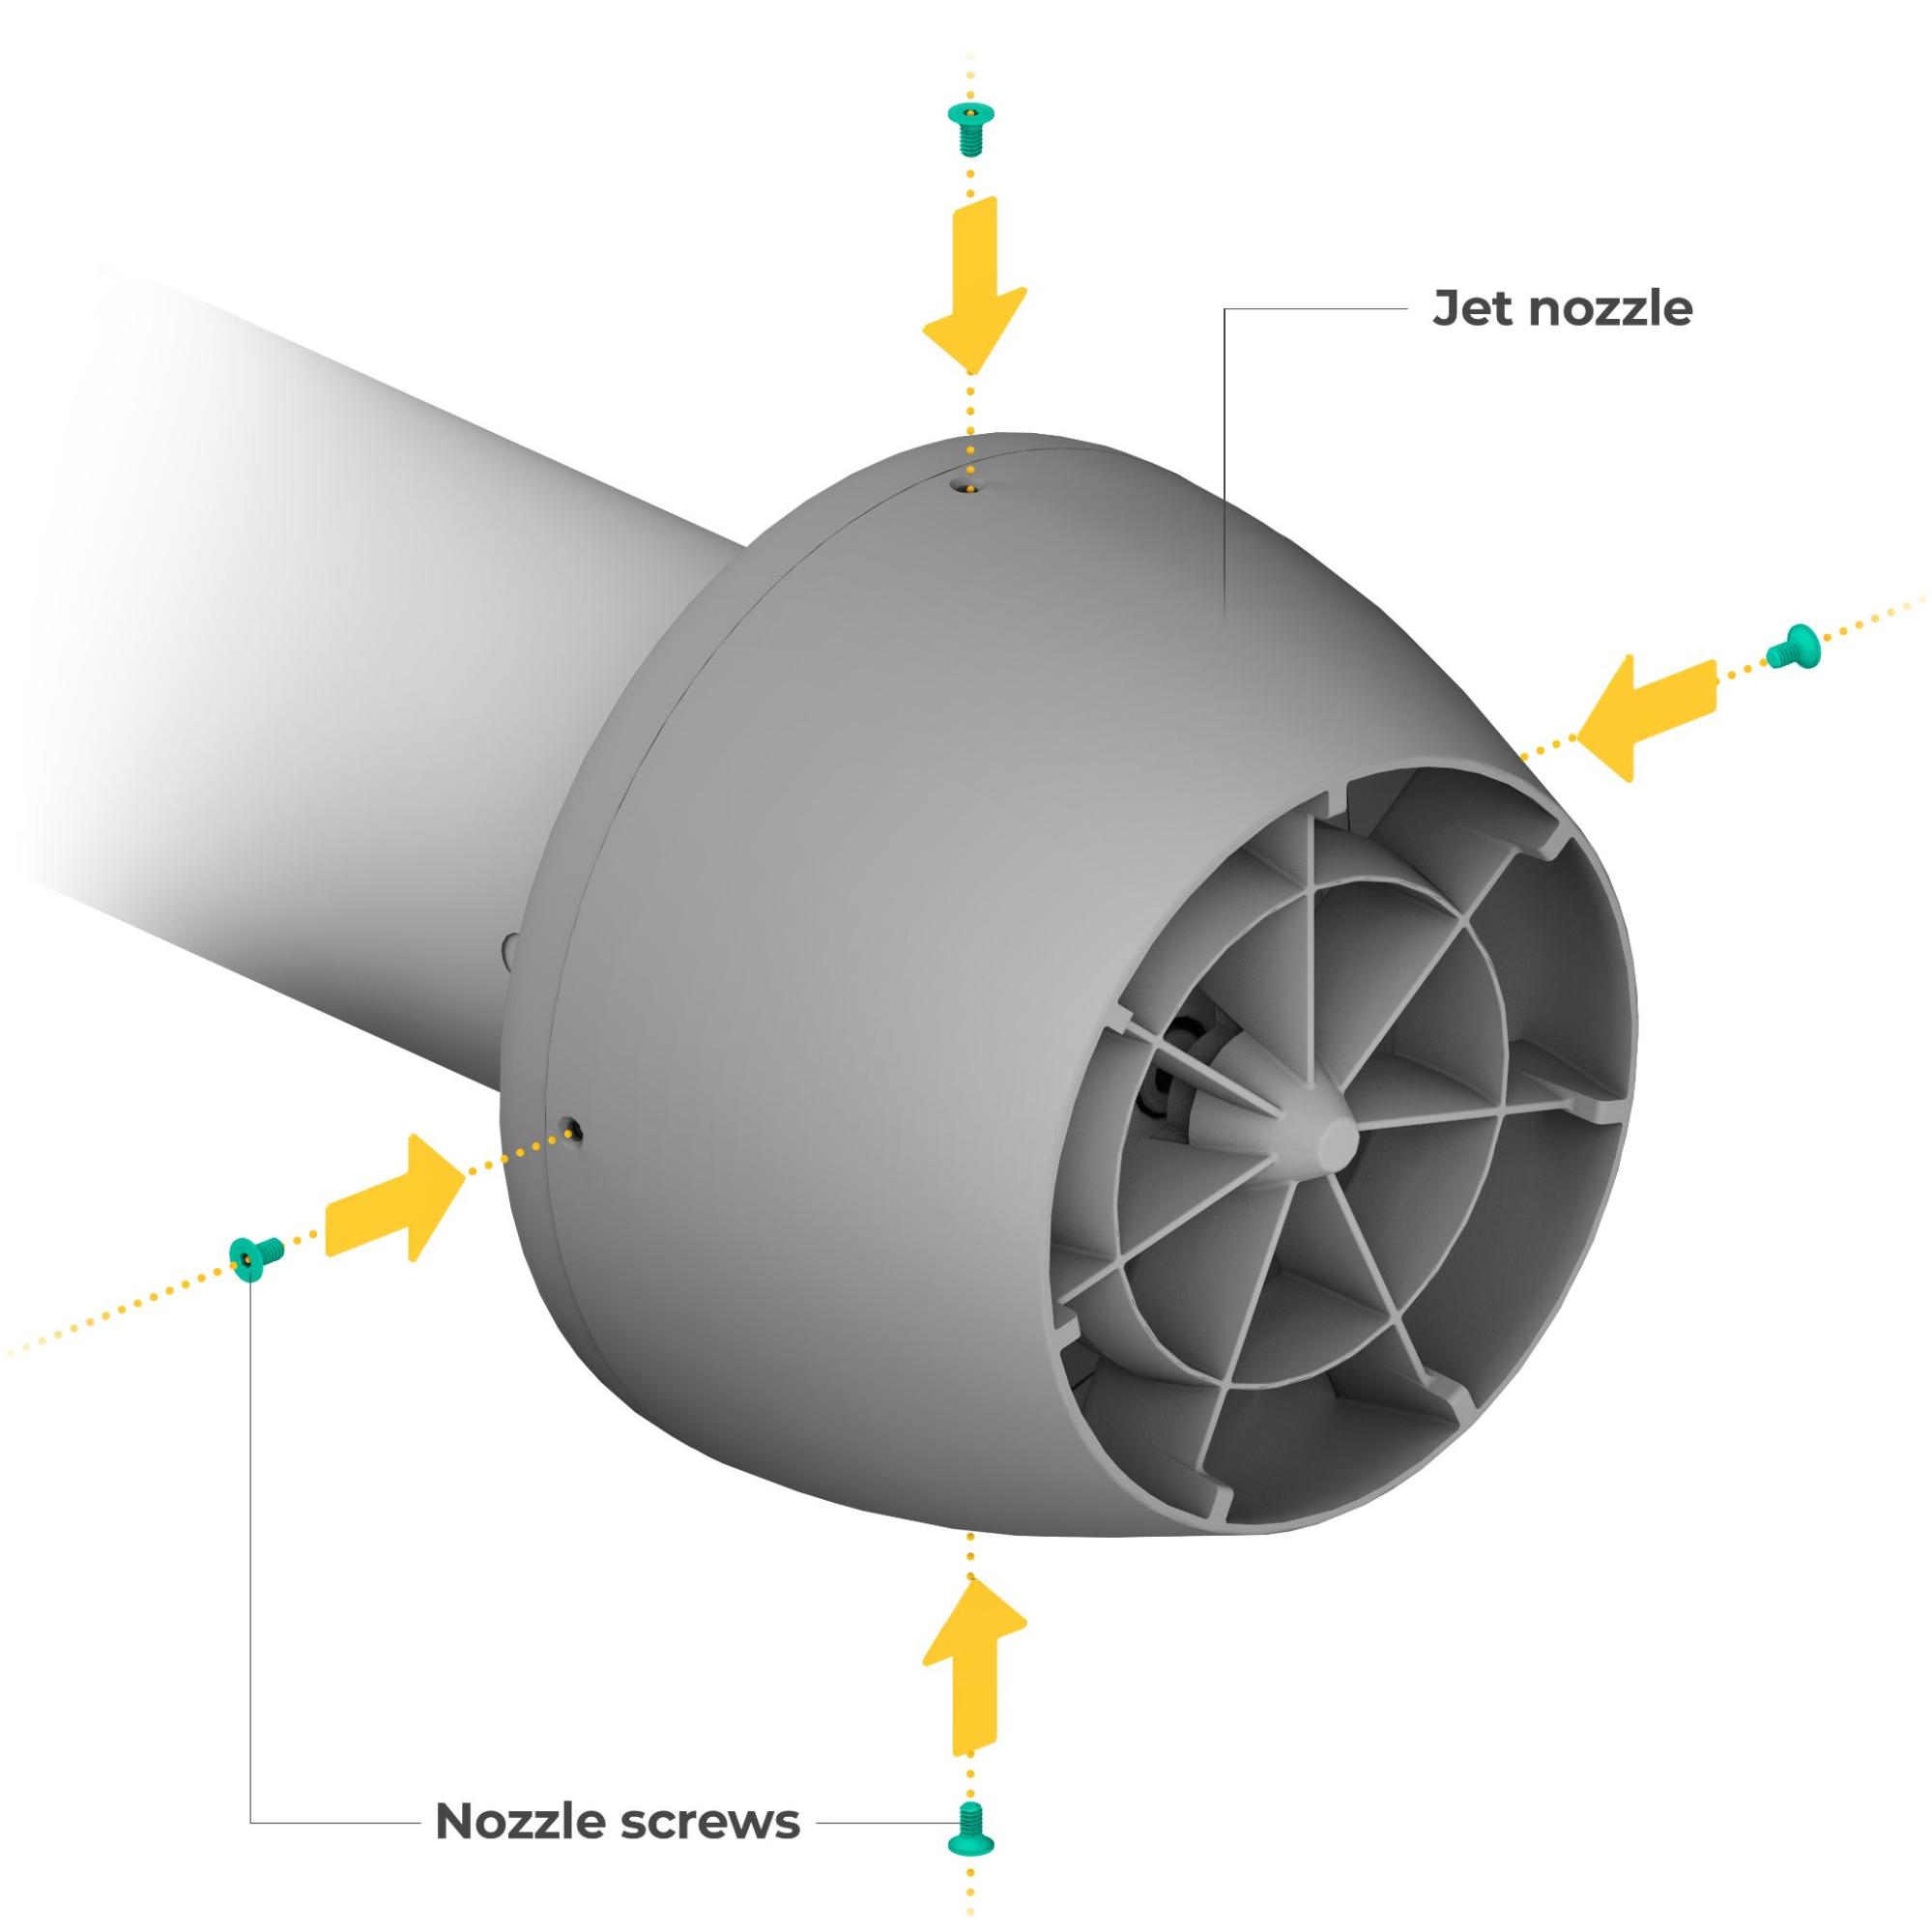
Align the jet nozzle to the shroud and press firmly into place.
STEP 6
Rotate the jet nozzle clockwise to secure it onto the shroud. Check to ensure all screw holes on the nozzle and shroud are aligned.
STEP 7
Install 4 Nozzle Screws using the 2mm hex key. Do not overtighten the screws.
And that’s it! Your Lift Jet should be ready to use. Enjoy!